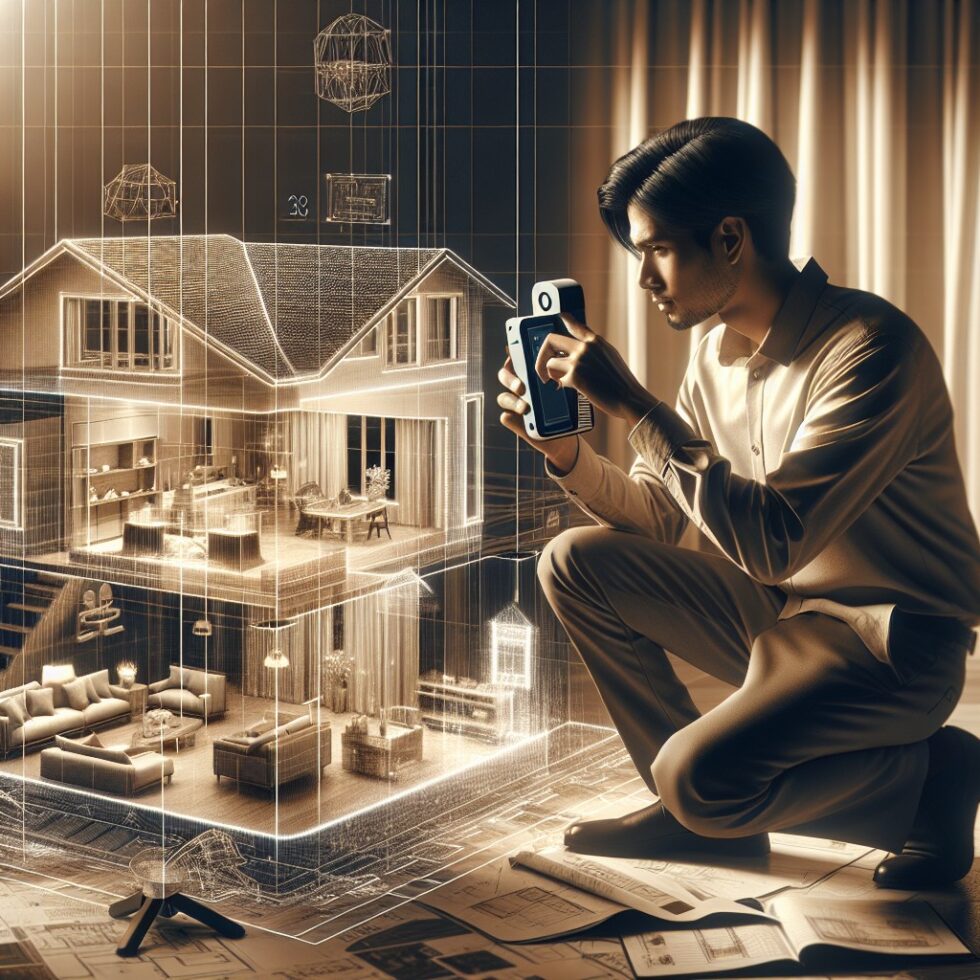
Creating a floor plan used to mean a tape measure, a sketchpad, and a patient afternoon. Today, a phone with a LiDAR sensor can map a room in minutes and give you a clean, editable plan plus a navigable 3D model. You can share it with a contractor, plan furniture with confidence, or document a rental for insurance—without hiring a survey crew or learning a full CAD suite. The trick is doing it in a way that’s accurate enough for real work and portable across the tools you already use.
This guide walks you through a practical, repeatable workflow for scanning, editing, and exporting your space. We’ll cover what accuracy to expect, how to avoid drift and reflection traps, which apps make life easier, how to get clean 2D plans and 3D models, and when to reach for photogrammetry instead of LiDAR. You’ll finish with files contractors understand, models you can drop into visualization software, and measurements that stand up to a tape check.
What You Can Realistically Expect From Phone LiDAR
Consumer LiDAR on modern phones (e.g., iPhone Pro and recent iPad Pro models) measures depth in a range roughly from a few inches up to several meters. In typical homes with decent lighting and textured walls, expect:
- Linear measurements: Often within 1–2% of a tape measure when you scan carefully and avoid long, featureless walls. A 5 m wall might read 5.05–5.10 m.
- Room area: Within 1–3% if you fully trace the perimeter and confirm door openings.
- Ceiling height: Within about 1–2 cm in typical 2.4–3 m rooms, but watch for sloped ceilings or soffits.
- Failure modes: Mirrors and glass, glossy black surfaces, and large blank walls can confuse depth or the device’s visual tracking. Plan to edit openings and refine lines in your floor plan tool.
These numbers won’t replace a laser distance meter on a commercial survey. But for renovation planning, furniture layout, insurance documentation, and small permits, this level of precision is usually more than enough—especially if you verify a few key dimensions with a tape and correct the model scale once.
Gear and Apps That Make It Easy
You don’t need much beyond a suitable device and a steady hand, but the right app can save hours.
Devices With Depth
- iPhone/iPad LiDAR: iPhone 12 Pro and later Pro models, iPad Pro (2020 or newer) include LiDAR. These work well with Apple’s RoomPlan framework, which many scanning apps use for faster, cleaner floor plan extraction.
- Android: Very few Android phones include LiDAR, but many support ARCore Depth API using RGB and motion to estimate depth. It’s not as precise as LiDAR but can be surprisingly capable in textured rooms with even lighting.
- No depth sensor? Photogrammetry is your friend. You’ll capture a quick video or a set of photos and reconstruct a 3D model with software. It’s slower and needs more cleanup but can capture rich texture and small details.
Recommended Apps
- Polycam: A balanced choice for fast LiDAR scans, space capture, and exports to OBJ/GLB/USDZ. It also supports photogrammetry if you lack LiDAR, making it a versatile first pick.
- Magicplan: Focused on floor plans with good editing tools. It lets you add doors, windows, symbols, and annotations. Handy for creating room-by-room plans and estimates.
- Canvas: A scan-and-ship service that can return CAD-friendly models; strong for remodelers who want clean as-builts without doing all the cleanup themselves.
- 3dScannerApp / SiteScape: Good alternatives for quick meshes and point clouds, with straightforward exports for Blender, SketchUp, and other 3D tools.
- Apple RoomPlan-based apps: Any app built on RoomPlan can auto-detect walls, doors, and windows from a LiDAR pass. Great for fast 2D/3D plans with semantic labels.
If your end goal is a 2D floor plan you can dimension, annotate, and export to PDF or DXF, prioritize apps with strong plan editing. If you want a 3D model for visualization, ensure your app exports to formats like USDZ, GLB, or OBJ.
A Scanning Workflow That Works
Good scans start before you hit record. This workflow is tuned for speed and reliable accuracy with minimal cleanup.
Before You Scan
- Declutter lightly: You don’t need to empty rooms. Just clear tight corners, move laundry piles, and open doors fully.
- Light it evenly: Turn on lights and open blinds. Avoid bright windows dominating the frame; they can throw tracking off.
- Add subtle texture if needed: For big blank walls, stick a few sheets of paper or painter’s tape as visual anchors to help the device track.
- Confirm units: Set your app to meters or feet matching how you plan to share the plan.
Room-by-Room Pass
- Start at a doorway: Stand in the threshold and slowly trace the perimeter from waist height. Keep the device 0.5–3 m from surfaces.
- Hug corners: Pause at each corner, give the sensor a second to lock, then transition to the next wall.
- Mark openings: Many apps let you tag doors and windows on the fly. If not, note them mentally; you’ll add them in the editor later.
- Look up and down: Do a slow sweep upward to capture ceiling height and down to catch baseboards and steps.
- Avoid mirrors head-on: Approach at an angle or cover mirrors with a towel to prevent phantom “holes.”
Connecting Rooms and Hallways
- Maintain continuity: Move gently through the doorway into the next room, keeping a portion of the last room in view to help tracking.
- Close loops: End a floor by walking back near your starting point if possible; this reduces drift.
- Label as you go: Use your app’s room naming to stay organized, especially in multi-room apartments or multi-story houses.
Stairs and Multi-Story Homes
- One floor at a time: Treat each story as a separate scan. It’s faster and avoids cross-floor drift.
- Anchor stairs: Scan the stairs from multiple angles, including a side profile, so risers and treads resolve cleanly.
- Align floors later: Most plan editors let you stack stories and align via stair openings or shared exterior walls.
Furniture: Include or Exclude?
It depends on your goal:
- Planning a remodel: Scan with furniture in place to capture obstructions. You can hide furniture layers later.
- Clean as-builts: Prefer rooms as empty as possible. Remove small items that create noise in the mesh.
Make an Accurate Floor Plan, Not Just a Pretty One
Automatic extractions are impressive, but you’ll get better results by validating a few key dimensions and fixing semantics.
Refine Walls, Doors, and Windows
- Snap walls to straight: Use your editor’s straighten/snap features to lock walls to 90° where appropriate.
- Door swings matter: Set the correct swing and width (e.g., 32 in / 813 mm) so the plan reflects usable clearance.
- Window heights: If your app supports it, set sill and head heights; they’re useful for cabinetry and trim planning.
Verify Dimensions and Scale
- Pick three checks: Measure the longest wall, a diagonal across a room, and the ceiling height with a tape. If the model is off by a consistent factor, adjust the plan scale once.
- Note wall thickness: Old houses vary. Set thickness per wall if your app allows; this affects accurate room areas.
- Document tolerance: Add a note like “Dimensions ±1.5%” to the PDF plan to set expectations with contractors.
Ceilings, Soffits, and Slopes
- Capture height changes: Mark bulkheads and soffits; they matter for ductwork, cabinets, and lighting.
- Sloped ceilings: If your app has limited slope support, add a section detail note with measured heights at fixed offsets from a wall.
From Scan to File: Choose the Right Formats
You’ll probably want a 2D plan for sharing and a 3D model for visualization. Pick formats your collaborators can open without new software.
2D Plans
- PDF: Universally readable. Great for markups and quick sharing.
- SVG/DXF: Editable in vector and CAD tools. DXF is a safe handoff to AutoCAD-type workflows; SVG is good for light edits and web embedding.
3D Models
- USDZ / USD: Apple’s AR-friendly format and Pixar’s scene format, respectively. Ideal for AR previews and interop in modern pipelines. Good choice if you want to stay compatible with USD-centric tools.
- GLB/GLTF: A compact, widely supported format that works in Blender, many web viewers, and game engines.
- OBJ: Older but simple. Comes with an MTL file for materials; nearly everything can open it.
- IFC: For BIM workflows. Heavier and more structured; consider if you’re handing off to an architect using Revit or similar.
Cleaning and Reducing Model Size
- Blender decimate: Use Blender’s Decimate modifier to reduce polygon count by 50–80% while keeping overall shape.
- Retopo for precision: For cabinetry or trim details, manual retopology plus snapping to key planes can yield crisp, lightweight models.
- Fix normals and holes: Recalculate normals and fill small mesh holes for reliable rendering across apps.
Practical Uses That Pay Off
Furniture Layout That Respects Reality
Drop a GLB or USDZ into a viewer and test actual clearances. Maintain walking paths at least 36 in (915 mm) where possible. Confirm door swings don’t clash with shelves or sofas. If you’re planning a dining room, verify chair pull-back space (~30 in / 760 mm) behind each seat.
Material Takeoffs and Quick Estimates
With clean perimeter and ceiling height, you can compute paint coverage or trim lengths. Example for one room:
- Paint wall area: wall area = perimeter × height − window areas − door areas.
- Baseboard length: equal to room perimeter minus door widths.
- Flooring: room area plus 5–10% waste, depending on pattern and installer preference.
Add these to your floor plan as text notes or export to CSV if the app supports it. A small set of consistent rules makes later changes easy to re-calc.
Contractor Collaboration
Send a single PDF with dimensions and a GLB/USDZ for 3D. Include a short note:
“Dimensions verified at three points; overall scale adjusted by +0.8%. Expect ±1.5% tolerance.” This saves back-and-forth and helps contractors trust the file.
Insurance and Rental Records
A dated scan of your place—plus photos of serial numbers—can simplify claims. Export a low-poly GLB for easy storage, keep the original high-res mesh separately, and store a PDF of each floor with room names. Back up to two locations (e.g., a cloud drive and an external SSD).
Troubleshooting: Avoid Drift, Ghosts, and Gaps
- Drift on long walls: Move slower and keep a corner or textured object in frame. If your plan editor supports snapping, straighten the wall after the scan.
- Mirrors and glass: Approach at an angle or cover with a towel. Manually add window openings later to match reality.
- Shiny floors: Scan from a slightly higher angle. If you see puddles of false depth, avoid pointing straight down.
- Scale seems off: Measure a known width (e.g., a 1 m or 4 ft segment), then adjust global scale in your editor if it’s consistently off.
- Dark rooms: Turn on lights. If that’s not possible, bring a small light or scan in daylight. Visual tracking needs features.
Privacy and Data Handling
Floor plans and 3D scans reveal a lot about your life. Treat them like documents with addresses or financial info:
- Work locally by default: Prefer apps that let you process on-device. If you need cloud processing, review privacy terms and sharing defaults.
- Strip metadata before sharing: Export a clean copy for contractors without geotags or room names that leak personal details.
- Version and archive: Keep dated versions for each major change. Store one offline backup (e.g., encrypted external SSD).
Time, Cost, and Storage
- Scan time: A 2–3 bedroom apartment might take 20–40 minutes for a careful pass, plus 30–60 minutes to refine dimensions and symbols.
- App costs: Expect a one-time purchase or a modest subscription. Some services charge per CAD conversion; budget accordingly if you need IFC or Revit-ready files.
- File sizes: Raw meshes can be hundreds of MB; decimated models and 2D plans are much smaller. Use GLB for compact sharing.
When Photogrammetry Beats LiDAR
LiDAR excels at geometry. Photogrammetry excels at texture and fine detail. If your device lacks LiDAR or you’re documenting ornate trim, art, or furniture, try a photogrammetry pass.
Fast Photogrammetry Workflow
- Capture: Walk around the subject or room slowly, keeping constant distance. Aim for steady video in good light, or take 50–200 photos with generous overlap.
- Reconstruct: Use tools like Meshroom, COLMAP, or Nerfstudio to build a point cloud and mesh.
- Scale accurately: Place two visible markers exactly 1 m (or 3 ft) apart and set that distance in your reconstruction tool. This establishes a trustworthy scale.
- Merge: If you also scanned with LiDAR, you can align the photogrammetry mesh to the LiDAR model (e.g., with Blender’s alignment tools) to combine precise geometry with rich textures.
Neural Methods: NeRFs and Gaussian Splatting
Neural radiance fields and Gaussian splatting offer lifelike views from new angles with stunning realism. They’re great for walkthroughs and VR previews, though less ideal for CAD-like editing. If you go this route:
- Consistency: Keep exposure and focus locked during capture.
- Coverage: Walk a gentle grid path around the room; capture corners and occluded areas from multiple angles.
- Export: Many viewers support web playback; keep a reference floor plan for measurements since splats aren’t dimension-driven.
Checklist: A Reliable Scan in One Pass
- Light the space evenly; open blinds and turn on lights.
- Start at a doorway, trace the full perimeter, and pause at each corner.
- Keep 0.5–3 m from walls; avoid pointing straight at mirrors.
- Connect rooms by keeping the previous room partially visible during transitions.
- Close the loop near your starting point to reduce drift.
- Verify three dimensions with a tape; adjust scale once if needed.
- Export a PDF plan and a GLB/USDZ model; decimate the mesh for sharing.
- Store a private, full-resolution original and share a redacted copy externally.
Putting It All Together
The difference between a neat demo and a plan you’ll use next year is small but important. Move slowly. Capture corners. Confirm a few measurements with a tape. Snap straight lines. Name rooms clearly. Export to formats your collaborators can open. If you’re consistent, you’ll build a home “as-built” that stays useful for years—saving time on every repair, remodel, and furniture shuffle that follows.
Summary:
- Phone LiDAR can deliver 1–2% linear accuracy with careful scanning, suitable for real planning work.
- Use apps that fit your goal: floor plans (PDF/DXF) or 3D models (USDZ/GLB/OBJ) with editable semantics.
- Scan methodically: start at a doorway, trace perimeters, avoid mirrors head-on, and close loops to fight drift.
- Refine plans by snapping walls, setting door swings, and verifying three key dimensions before scaling.
- Export compact, clean models for sharing and keep a high-res master privately archived.
- Photogrammetry (and neural methods) are great for texture-rich detail or when LiDAR isn’t available—just remember to set scale.