Why Home Biogas Is Worth a Look
Most households throw away energy every day in the form of food scraps and yard waste. Home biogas systems use anaerobic digestion to turn that waste into cooking gas and a nutrient‑rich liquid fertilizer. When set up safely and sized correctly, a digester can deliver real, repeatable value: less trash, lower propane use, and better soil. This guide explains what biogas can and can’t do at domestic scale, how to choose a digester style, what to feed it, and how to run it without surprises.
We’ll keep the language plain and the steps practical. You’ll also find clear safety notes, basic math for sizing, and maintenance routines you can actually keep up with.
Biogas Basics You Can Use
What biogas is made of
Biogas is mostly methane (CH4, about 55–65%), plus carbon dioxide (CO2) and small amounts of other gases like water vapor and hydrogen sulfide (H2S). Methane is the energy carrier; CO2 and water don’t burn; and H2S is corrosive and toxic in high concentration. We’ll show how to handle those safely.
How much energy is in it
Typical biogas delivers roughly 5.5–6.5 kWh of energy per cubic meter (m3), depending on methane content. In everyday terms, 1 m3 can power about 1–2 hours of cooking on a small, well‑matched biogas stove. Exact cook time varies with burner design and how high you run the flame.
What output to expect from household scraps
Yields vary with feedstock and temperature. Kitchen scraps and food waste often produce 80–200 liters of biogas per kilogram of fresh waste when well digested. Yard clippings and woody materials produce less unless they’re very soft and shredded. Most homes can expect enough gas for daily tea and a simple meal from consistent, well‑managed inputs. If you want long, high‑heat cooking every day, you’ll need more feedstock and a larger, warmer digester.
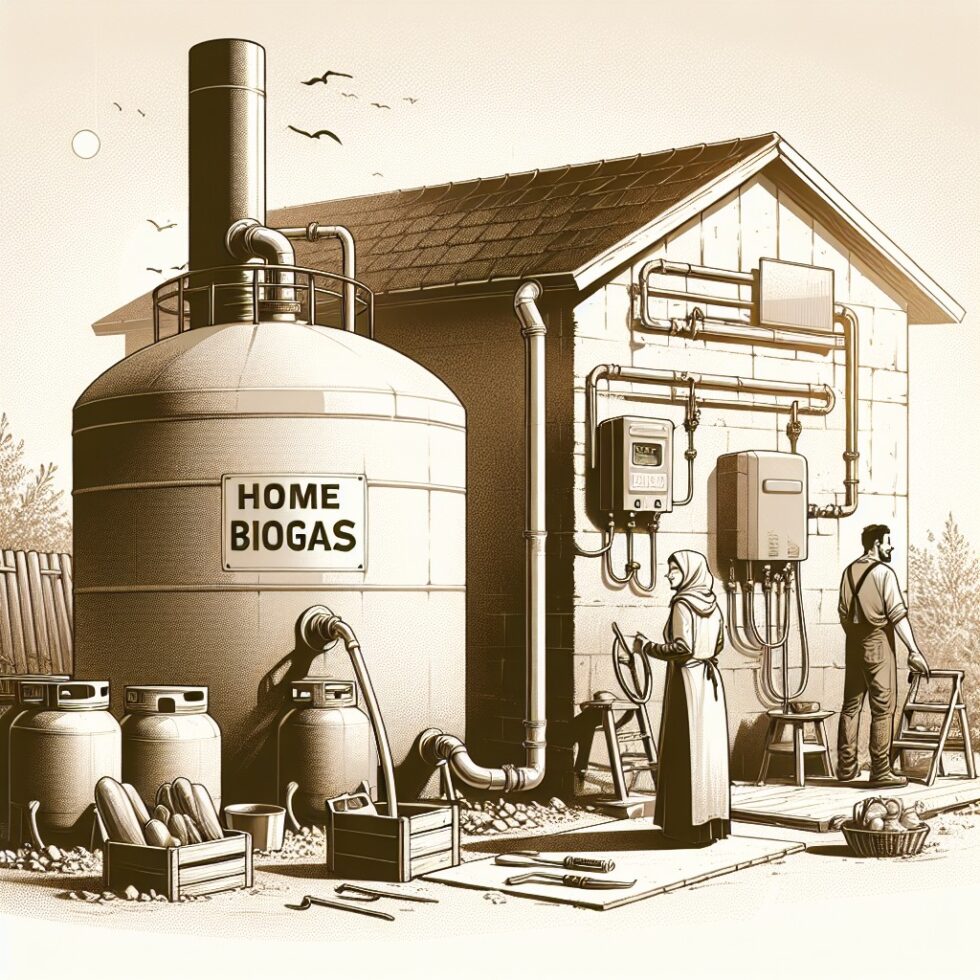
Pick a Digester Style That Fits Your Reality
There’s no single “best” home digester. Your climate, space, and maintenance appetite decide. Four styles cover most needs:
- Flexible Bag (geomembrane) digesters: A UV‑resistant plastic bag acts as tank and sometimes gas storage. Pros: quick to install, low upfront cost, simple. Cons: limited lifespan outdoors, can puncture; needs a support frame and shading in hot sun.
- Floating Drum: A rigid tank with an inverted drum that rises and falls with gas volume, giving near‑constant pressure. Pros: intuitive fill‑level indicator, steady flame, easy visual checks. Cons: moving parts can rust; heavier and costlier than bags.
- Fixed‑Dome (masonry): A buried brick/concrete chamber with a domed top that stores gas. Pros: durable, discrete, temperature‑stable once buried. Cons: construction skill needed; pressure varies with gas volume; hard to modify later.
- IBC Tote or Barrel DIY: Re‑purposed food‑grade containers plumbed and insulated. Pros: accessible components, modular, repairable. Cons: requires careful sealing, pressure control, and gas handling; not as “turnkey.”
If you’re starting from zero, a bag system is the fastest path to learning. If you want long life and a tidy yard, a fixed‑dome or floating drum is more work upfront but pays off later.
Size It Right: Temperature, Volume, and Daily Input
Temperature is destiny
Digesters are biological. Warmer systems (30–38°C, “mesophilic”) work faster and more completely than cold ones. Below ~15°C, gas production slows sharply. Plan for your coldest season when sizing. If your winters are cold, bury the digester, add insulation, or schedule low‑demand operation until spring.
Hydraulic retention time (HRT) and volume
HRT is how long the slurry stays in the digester. A practical rule: HRT of 30–50 days for kitchen scraps at mesophilic temperatures. In colder weather aim longer.
To size the tank, multiply your daily slurry volume (feedstock plus dilution water) by the HRT. If you feed 10 liters per day and pick 40 days, you need ~400 liters of liquid capacity, plus gas headspace. Round up to the next common tank size for comfort.
Daily slurry math you can trust
- Start with the wet feedstock mass (kg/day). For many homes, 1–2 kg of kitchen scraps/day is realistic.
- Plan 1:1 dilution by volume with water for easy pumping and stable pH. Example: 2 kg scraps ≈ 2–3 liters volume; add 2–3 liters water → 4–6 liters/day of slurry.
- Match the stove demand to likely yield (80–200 L/kg). At 2 kg/day, expect 160–400 L/day (~0.16–0.4 m3), enough for short daily cooking, not marathon sessions.
Feedstock: What to Add and What to Skip
Good inputs for steady gas
- Vegetable and fruit scraps: Chop or blender‑pulse for faster digestion.
- Cooked rice, pasta, bread: Carbs digest well; avoid large, dry chunks without water.
- Small amounts of dairy and meat: Possible, but go easy; they can cause scum and odor if overdone.
- Coffee grounds and tea: Fine in moderation; they add grit and nitrogen.
Inputs that cause headaches
- Lots of oils and fats: Can float, form scum, and smell. Keep to a small fraction of total feed.
- Citrus peels in bulk: Limonene inhibits microbes. Add sparingly or compost separately.
- Bones, pits, woody stems: Too slow to break down; they accumulate.
- Chemicals, bleach, detergents, salty brines: Toxic to the digester community. Keep them out.
Keep the biology happy: pH and alkalinity
A healthy digester runs around pH 6.8–7.4. If sour smells rise and gas lags, acids may be building up. Dilute feeds, skip a day, and add a bit of bicarbonate (baking soda) to boost alkalinity. Avoid lye or harsh chemicals. Steady, modest feeding beats feast‑and‑famine.
Gas Handling: Drying, Scrubbing, Storage, and Stoves
Moisture and H2S removal
- Water trap: Put a simple condensate loop near the digester outlet; drain it often. Dry gas burns better.
- H2S scrubber: Route gas through a small canister filled with iron oxide media (rusted steel wool or commercial pellets). Replace or regenerate when you smell sulfur near the stove or see black tarnish on metals. This step protects burners and your lungs.
Storage and pressure
- Never compress biogas into high‑pressure cylinders at home. That requires specialized equipment and rigorous safety standards.
- Use a floating drum or a gas bag for low‑pressure storage (typically 8–20 mbar). A floating drum gives steadier pressure; a bag is simpler and cheaper.
- Fit a manometer (U‑tube water gauge) to see actual line pressure. You’ll learn what “normal” looks like for your system.
Piping and materials
- Use plastic (PE or PVC) or stainless steel for gas lines after the scrubber. Avoid copper and plain steel downstream of H2S; they corrode fast.
- Include check valves to prevent backflow and a flame arrestor near the stove to stop flashback.
- Keep runs short and avoid kinks; biogas is low pressure, so friction losses matter.
Stoves that actually work
Biogas burns best in stoves made or adapted for low pressure and lower energy density than LPG. Look for a biogas‑rated burner or a conversion kit. You want a slightly larger jet and a proper air‑mix design. Expect a soft blue flame when things are right; yellow tips often mean excess moisture or poor mixing.
Start‑Up: From Slurry to Usable Flame
Inoculation and ramp‑up
- Kick‑start with active inoculum: cow or goat manure, digester effluent from a neighbor, or municipal anaerobic digester sludge. This seeds the right microbes.
- Fill the tank to its working liquid level with water and inoculum slurry. Then feed small daily portions (10–25% of your target rate) for a week or two.
- Expect CO2-rich gas first. After 1–3 weeks (warmer is faster), methane rises and the flame improves. Be patient.
Daily and weekly care
- Feed at the same time daily. Small consistent inputs keep pH and gas output steady.
- Observe the gas: flame color, smell, and pressure on the manometer. Track how long your storage lasts each day.
- Stir or flush gently if your design allows. Avoid violent mixing; you can disrupt the microbial zones.
- Drain condensate to keep lines dry.
Cold Weather Tactics
Insulation and passive solar
Bury the digester or wrap it in closed‑cell foam. If you can, build a small greenhouse shell over the unit. Dark‑colored tanks under a clear cover can gain several degrees on sunny days. Even a 3–5°C boost can keep gas flowing.
Seasonal operating modes
- Low‑power mode: Cut feed in winter to match the slower biology. If the tank gets acid, pause feeding and let microbes catch up.
- Heat thriftily: If you add heat, do it safely and efficiently (e.g., a thermostatic aquarium heater in an internal sleeve, or solar hot water loop). Always keep electrical parts isolated from gas spaces.
Digestate: Use It Well, Use It Safely
The liquid coming out of your digester—often called digestate, bioslurry, or effluent—is rich in plant nutrients and more stable than raw waste. It still needs respectful handling:
- Storage: Hold digestate for 30–60 days before field use to further reduce pathogens, especially if you ever added meat or dairy.
- Application: Apply to soil and cover it, or use in drip irrigation to minimize exposure. Keep it off edible leaves and fruits, and avoid direct use on salad greens or root crops eaten raw.
- Rules: Follow local regulations on bioslurry handling. Every region differs.
Done right, digestate can replace part of your synthetic fertilizer, improve soil structure, and close a satisfying loop in your yard.
Safety: Non‑Negotiables
- Ventilation: Keep all gas handling outdoors or in well‑ventilated spaces. Methane is flammable; H2S is hazardous.
- No flames or sparks near the digester, storage, or scrubber. Treat it like a gas appliance.
- Gas detection: Consider a methane detector near the stove area. If you ever smell strong sulfur (rotten egg), stop, ventilate, and check the scrubber.
- Backflow protection: Use flame arrestors and check valves. A simple water seal bubbler can add extra safety.
- Placement: Site the system away from bedrooms, ignition sources, and property lines as required by local codes. Keep children and pets away from moving parts and gas lines.
- Never compress biogas into high‑pressure tanks at home. Low‑pressure storage only.
Budgeting and a Simple Bill of Materials
What it can cost
- Turnkey bag systems: Often a few hundred to a couple thousand dollars, depending on size and included stove and filters.
- DIY IBC or drum: Materials (tank, piping, valves, scrubber media, insulation) may land in the mid‑hundreds if you source used, clean, food‑grade containers. Don’t skimp on gas safety parts.
Core components checklist
- Digester tank (bag, drum, dome, or IBC) with inlet and outlet plumbing
- Feed hopper and grinder/blender for scraps
- Gas line with water trap, H2S scrubber, check valves, manometer, and flame arrestor
- Gas storage (floating drum or bag) and shutoff valve
- Biogas‑rated stove or conversion kit
- Insulation, weather protection, and a simple thermometer
An Example Plan for a Family of Four
Let’s imagine a family that reliably generates about 1.5 kg of kitchen scraps per day (vegetable peels, leftovers, coffee grounds). They want daily tea and a simple stir‑fry on biogas.
- Expected yield: 1.5 kg/day × 100–180 L/kg ≈ 150–270 liters/day (~0.15–0.27 m3), enough for 30–90 minutes of cooking with a biogas‑rated burner.
- Daily slurry: Blend scraps, dilute 1:1 with water → ~3–4 liters/day.
- HRT and volume: At 35 days HRT, liquid capacity ≈ 35 × 3.5 L ≈ 122 liters. Round up to a 250–500 liter digester to handle colder days, extra feed, and gas headspace.
- Storage: A 200–300 liter gas bag covers a day of average gas. If you want to cook less frequently but longer, add a second bag in parallel.
- Layout: Feed hopper → digester → overflow to a covered digestate barrel → gas line with trap and scrubber → storage bag → stove (with flame arrestor and shutoff).
In warm months, this system should deliver daily, short cooking sessions. In cold months, reduce feeding, insulate, and expect less gas.
Troubleshooting: What the System Is Telling You
Weak flame or short cook time
- Check pressure on the manometer. If low, you may need more storage or you’re feeding less than you think.
- Drain moisture and refresh H2S scrubber media; wet or sulfur‑rich gas burns poorly.
- Inspect stove jet for clogs and confirm it’s sized for biogas.
Bad smells around the digester
- Overfeeding can cause acid buildup. Pause feed, add dilution water, and let it recover.
- Leaky joints in gas lines will vent odor. Soap‑test fittings and reseal.
Foam and scum
- Too much oil/fat or sudden high‑protein loads can cause scum. Skim if your design allows; cut back for a week.
- Gentle mixing helps. Add a small baffle or stir sparingly.
Winter stall
- Insulate more, add a simple solar cover, and lower the feed rate.
- If needed, use a safe, thermostatic heater with a dry well sleeve to avoid any contact between electricity and gas.
Design Tips That Pay Off
- Keep runs short: Place storage near the digester to minimize friction losses in low‑pressure gas.
- Make maintenance visible: A sight glass on the scrubber, a clear condensate loop, and labeled valves make life easier.
- Plan for overflow: Digestate will come out every time you feed. Channel it to a covered barrel or trench.
- Document your baseline: Note daily feed amounts, gas duration, and weather. You’ll spot issues early.
Common Myths, Debunked
- “Biogas will replace my LPG entirely.” For most homes, biogas is a supplement, not a total replacement—unless you have abundant, steady feedstock and a warm climate.
- “Any burner works.” No. Biogas needs the right jet and air mix. A poor match wastes gas and frustrates users.
- “Bigger is always better.” Not if it’s underfed or cold. A right‑sized, well‑fed, insulated digester outperforms a giant cold tank.
Regulations and Good Neighbor Practices
Rules vary by city and country. Before you build:
- Check local codes for on‑site waste handling, gas appliances, and setbacks.
- Position discreetly: Bury fixed units where possible, screen above‑ground bags, and prevent standing water.
- Be proactive: Share what you’re doing with neighbors; explain odor controls and safety devices. A tidy install earns trust.
Level Up: From Starter to Stable
Add sensors thoughtfully
If you enjoy tinkering, a low‑cost temperature probe and a simple gas flow meter can teach you a lot. Focus on reliability: sensors should never be leak points. Battery‑powered devices should be outside gas spaces; route wires carefully.
Optimize feed prep
Grinding scraps and keeping a consistent carbon‑to‑nitrogen mix (roughly 20–30:1) improves gas and reduces scum. In practice, that means balancing carb‑heavy leftovers with some leafy greens or coffee grounds. Don’t overthink it; avoid extremes.
What Success Looks Like
A successful home biogas setup feels calm: a daily feed routine, a soft blue flame when you cook, and a quiet trickle of digestate into a covered barrel. No surprises, no big swings. If your first system feels fussy, scale back, simplify plumbing, insulate more, and feed less for a while. The microbe community rewards patience.
Summary:
- Biogas from kitchen scraps can fuel daily cooking if your digester is right‑sized and warm enough.
- Choose a digester style that matches your climate and tolerance for construction: bag, floating drum, fixed‑dome, or DIY IBC.
- Plan for an HRT of 30–50 days, dilute 1:1 with water, and expect 80–200 L/kg of biogas from food waste.
- Use a water trap and H2S scrubber, store gas at low pressure, and pick a biogas‑rated stove.
- Start slowly with inoculation, feed consistently, and insulate or reduce load in cold seasons.
- Handle digestate safely: store 30–60 days, keep off edible leaves, and follow local rules.
- Safety is non‑negotiable: ventilation, no ignition sources, detectors, check valves, and flame arrestors.