Water is the quiet utility. It mostly works until it does not. A tiny toilet leak can waste hundreds of gallons a day. A burst pipe can leave a soaked floor in an hour. Irrigation that runs on a fixed timer can overwater for months. You can fix all three with a small stack: a reliable flow sensor, an autoshutoff valve, and smarter irrigation. This guide shows how to build and operate a setup that is practical, maintainable, and not married to a single cloud service.
What “smart water” should actually do
A water system you can live with every day is simple: measure, decide, act. That means:
- Measure total flow with enough accuracy to see small leaks, yet robust enough to survive outdoor enclosures and odd plumbing runs.
- Decide locally, using clear rules (“no flow at night,” “flow pattern looks like a burst,” “irrigation scheduled but it rained”).
- Act with a dependable valve that closes when asked, and never traps you without a manual bypass.
Do this well and you avoid surprise bills, prevent water damage, and reduce outdoor use without babysitting the system.
Pick a metering approach that fits your pipes
There are three practical ways to measure water at home: clamp‑on ultrasonic sensors, inline smart meters, and readers for your existing mechanical meter. Each has trade‑offs.
Clamp‑on ultrasonic: non‑invasive and renter‑friendly
Clamp‑on ultrasonic meters strap to the outside of a pipe and time how sound pulses move through flowing water. They work on copper, PEX, steel, and some plastics. Because they never touch the water, you avoid plumbing cuts and can install in minutes.
Pros: No pipe cutting, no pressure loss, easy to move or replace, safe for older plumbing. Cons: Sensitive to pipe material and straight‑run requirements; needs careful placement and coupling gel; can drift and needs calibration checks.
Get it right:
- Choose the right transducer set for your pipe diameter and material. Vendors specify V, Z, or W mounting patterns for different diameters.
- Prep the pipe: clean paint or oxidation off the mounting area. Use the manufacturer’s coupling gel or pads to ensure a tight acoustic bond.
- Respect straight runs: aim for at least 10 pipe diameters of straight pipe before the sensor and 5 after. If you have elbows nearby, move farther if possible.
- Run a reality check: do a bucket test. Fill a known volume (for example, 5 gallons or 20 liters) at a steady faucet and compare to your meter reading. Adjust calibration if your model allows.
Inline smart meters: accurate and permanent
Inline smart meters (turbine or ultrasonic) go into the pipe and directly measure flow. They can be very accurate across a wide range, and some include built‑in temperature and pressure sensors.
Pros: High accuracy, stable readings at low and high flows, simple pulse or digital outputs. Cons: Requires cutting pipe and plumbing skills, introduces slight pressure drop, needs isolation valves on both sides for maintenance.
Get it right:
- Install isolation valves up- and downstream to service the meter later without shutting water off to the whole house.
- Mind orientation: meters have a preferred horizontal or vertical orientation and flow direction.
- Protect from debris with a Y‑strainer upstream if your water has grit or if you have well water.
- Allow for freezing if installed outdoors. Provide insulation and a freeze drain point when possible.
Readers for existing mechanical meters: fast and low cost
If your home already has a municipal mechanical meter, you can sometimes add an optical or magnetic sensor that counts the pulses of the register wheel or a magnet embedded in the dial. Some consumer products clip on non‑invasively and read the dial optically.
Pros: No plumbing changes, fast to install, generally landlord‑safe. Cons: Dependent on meter model and physical access; may be less sensitive at very low flows; outdoor pits can flood and damage electronics.
Check rules first: Many utilities own the meter. In some places you cannot attach anything to it. If adding a clip‑on reader, make sure it is weather‑rated and mounted with a proper bracket, not tape.
Networking that lasts beyond a router reboot
Great metering fails if your network does. Keep the signal chain predictable and power‑aware.
Power and enclosures
- Outdoors: Use weather‑rated enclosures (NEMA 4X or IP66), breathable membrane vents to avoid condensation, and strain relief for cables.
- Indoors near the main: Mount electronics off the floor. Leaks travel downward. A simple drip loop can save a board.
- Power: Mains power with a small UPS keeps logging through brief outages. Battery‑only nodes should send sparse updates and sleep between samples.
Connectivity choices without hand‑wringing
- Wi‑Fi is fine for indoor meters and valves near an access point. Use 2.4 GHz for range. Fix DHCP reservations and use a separate IoT SSID if you have it.
- Sub‑GHz (LoRaWAN) shines for outdoor pits, detached garages, and long backyards. It penetrates walls and soil better, and batteries last months or years with a 1–5 minute interval. You can run your own gateway.
- BLE is good for short‑range clip‑ons that relay through a nearby hub. It is not ideal for whole‑property coverage by itself.
Rule of thumb: if the device sits near your main router, use Wi‑Fi. If it sits in a pit or far edge of the yard, use LoRaWAN or a sub‑GHz proprietary link with documented specs.
Data model: from pulses to liters you can trust
Water usage models usually boil down to pulses or flow rates. Do this once and do it cleanly:
- Normalize units to liters or gallons early, not per‑minute or per‑hour rates. Do rate conversions in your dashboard later.
- Debounce pulses from mechanical meters. Add a 30–100 ms guard time to ignore switch bounce.
- Handle backflow by allowing negative values if your meter supports direction. Otherwise, clamp to zero.
- Smooth display with a 30–60 second rolling average for flow graphs. Keep raw values for rules.
Once you have a stable stream, feed it into a local system for storage and rules. A low‑cost single‑board computer can run a time‑series database and an automation engine on‑site, with optional secure remote access.
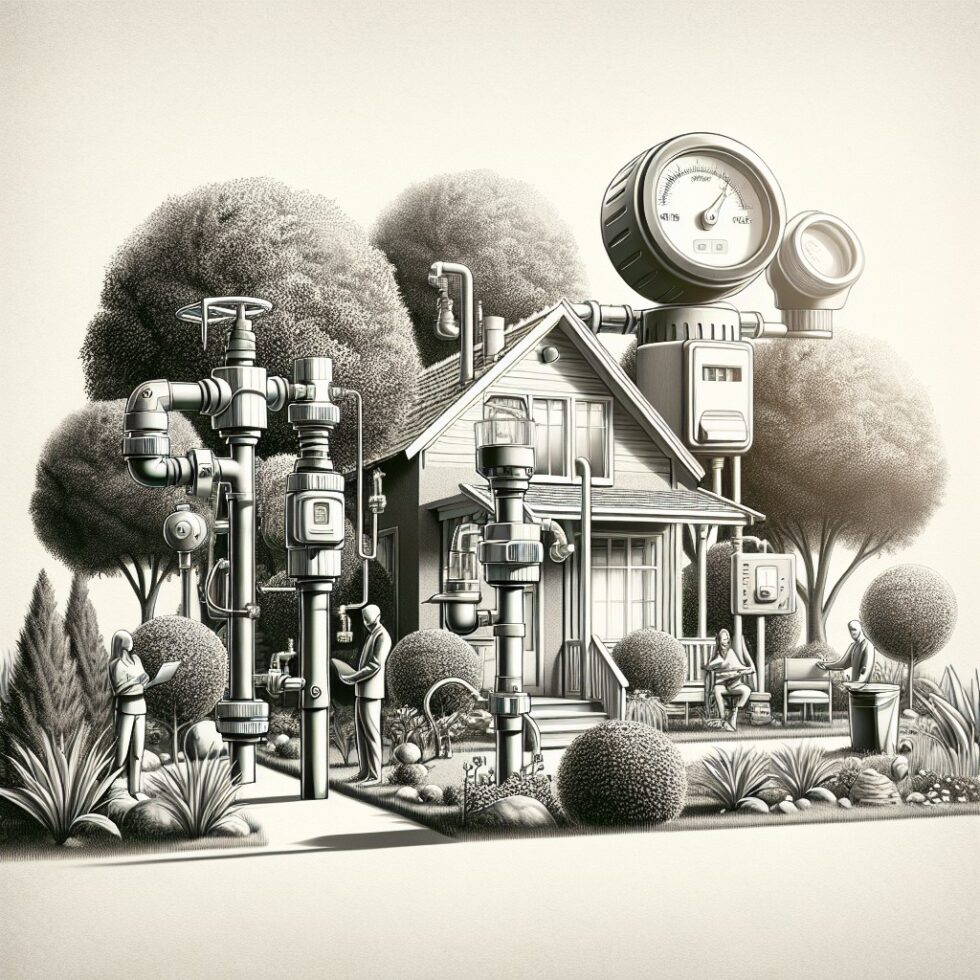
Autoshutoff and leak detection that do not get in your way
Shutting water off should be boring, reliable, and reversible. Start with the valve hardware, then design rules around how your home actually uses water.
Pick a dependable valve
- Motorized ball valves are the most reliable for whole‑home shutoff. They rotate 90° and do not need continuous power to hold a position. Choose stainless or brass. Avoid plastic for main lines.
- Solenoids are common for irrigation zones but draw more power and get hot. They are fine downstream on zones, not ideal as a main shutoff.
- Manual bypass is mandatory. Install a hand valve parallel to the motorized one. If the actuator fails, you can still get water.
- Fail‑safe behavior: Decide if you want the valve to default to open or closed on power loss. Most homes prefer “open” to keep heat and toilets running during long outages. If you travel often, a default‑closed approach with a manual bypass can work.
Rules that catch real leaks without false alarms
Start simple. Tune thresholds to your home and then add nuance.
- Night‑flow rule: If flow exceeds 0.2–0.4 gpm (0.75–1.5 L/min) for more than 10 minutes between midnight and 5 a.m., alert. After 20 minutes, close the valve unless someone acknowledges the alert.
- Burst rule: If flow jumps above your typical shower maximum (for example, 3 gpm / 11 L/min) and stays there for more than 3–5 minutes, shut off immediately. Reopen after a manual check.
- Long‑tail drip rule: Track cumulative flow per hour. If water runs for more than 60 minutes with an average under 0.5 gpm (1.9 L/min), you likely have a slow leak (toilet flapper, RO system). Alert but do not shut off automatically.
- Irrigation windows: Tag irrigation zones by schedule and expected flow. Suspend burst rules during runs, but keep a cap (for example, if a zone exceeds 1.2× its normal flow for more than 5 minutes, assume a broken head and shut that zone’s valve).
Always provide an override that a person in the house can use, with a visible countdown for auto‑rearm. Put a physical button near the main, and a clear mobile action for remote restarts.
Protect the plumbing
- Water hammer can occur when closing the main quickly. Choose valves that take 2–10 seconds to close, not instant slam‑shut ones.
- Exercise monthly: Cycle the motorized valve open‑close‑open to prevent sticking. Automate it during a known low‑use time with a brief alert.
- Backflow safety: If your irrigation is tied to the main, ensure the required backflow preventer is installed and tested per local rules. Never tie non‑potable water back into the potable system.
Smarter irrigation with less guessing
Smart irrigation is not about new sprinklers. It is about better timing. Two signals matter: weather and soil.
Use ET‑based scheduling
Evapotranspiration (ET) estimates how much water leaves your yard via evaporation and plant transpiration. An ET‑based schedule replaces only what was lost since the last cycle.
- Local weather helps. If you have a backyard station, use its temperature, humidity, solar radiation, and wind. If not, pull trusted data from nearby stations.
- Zone factors differ. A sunny lawn loses more than a shaded garden. Assign crop coefficients and allowable depletion by zone. Most smart controllers provide templates; start there and adjust.
- Rain and freeze skips should be on by default. Skip if rain in the last 24–48 hours exceeded a threshold, or if forecast freeze is within 12 hours.
Soil moisture sensors: helpful, not mandatory
Soil probes reduce guesswork but can be finicky. If you add them:
- Place them right: 4–6 inches deep for turf, in the root zone for shrubs. Avoid placing next to emitters or in low spots.
- Calibrate per soil: Sandy soil drains fast; clay holds water. Use the probe’s recommended calibration routine.
- Use as a veto: Let ET decide when to water, and let moisture probes pause if soil is still wet.
Zone specifics that save water fast
- Drip beats spray for beds and shrubs. Less evaporation, less overspray. If you cannot switch, reduce nozzle size and fix alignment.
- Cycle and soak for slopes and clay. Split long runs into multiple short cycles with rests to avoid runoff.
- Watch real flow per zone. If a zone’s flow rises over time, suspect broken emitters or heads. If it drops, suspect clogs or valve issues.
Privacy and data you can live with
Water use patterns can reveal routines. Treat flow data as private by default.
- Process locally and only forward alerts to the cloud if needed. Avoid devices that require external services to work at all.
- Encrypt remote access: If you want away‑from‑home alerts or control, use a secure tunnel or trusted remote access method. Do not expose a raw dashboard to the internet.
- Share only aggregates if you join a neighborhood or city conservation program. Hourly or daily totals are usually enough.
UX that prevents “alert fatigue”
To make this stick with everyone at home, keep the interface obvious and kind.
- Clear states: “Water ON,” “Water OFF,” and a big Temporarily Allow button during anomalies (for example, filling a pool).
- Quiet hours and snooze: Night alerts should be rare and urgent. Add a “Shower in progress” snooze for 15 minutes.
- Budget view: Show a simple monthly forecast versus last month. Avoid shaming; highlight wins like “You saved 600 gallons this week by skipping irrigation twice.”
A four‑week rollout you can finish
Week 1: Measure
- Pick your meter type and install it properly.
- Validate with a bucket test and a day of normal use graphs.
- Set up local logging with timestamps and units.
Week 2: Alerts
- Add night‑flow and burst rules with notifications only.
- Log irrigation runs and typical shower/wash flows to inform thresholds.
Week 3: Autoshutoff
- Install a motorized ball valve with a manual bypass and test close/open a few times.
- Turn on auto‑close for burst rule; keep drip rule as alert‑only.
Week 4: Smarter irrigation
- Enable ET‑based scheduling and rain/freeze skip.
- Tag each zone with expected flow and cap; create per‑zone leak responses.
Costs and what not to overspend on
- Clamp‑on sensors: mid‑range units are plenty. Pay for correct transducers and good clamps, not for an oversized display.
- Inline meters: spend on quality bodies and serviceable unions. Avoid proprietary data outputs you cannot read locally.
- Valves: good brass or stainless motorized ball valves cost more but outlast cheap actuators. The bypass and isolation valves are not optional.
- Controllers: a modest irrigation controller with ET support and open integrations beats a flashy touchscreen that locks you into one vendor.
Maintenance that prevents surprises
- Quarterly: check transducer coupling on clamp‑ons, re‑gel if needed; re‑run a quick bucket test.
- Monthly: exercise the main shutoff valve; verify its limit switches and end stops.
- Seasonal: adjust ET multipliers as seasons change. Inspect irrigation heads at startup. Winterize outdoor runs where needed.
- Annually: test backflow devices per local requirements; replace worn gaskets in unions; review alert thresholds against actual data.
Troubleshooting common issues
Unstable readings on clamp‑on sensors
- Cause: bubbles or poor coupling. Fix: pick a calmer section of pipe, reduce pump speed temporarily if on a well, re‑gel and tighten clamps.
- Cause: too close to elbows or tees. Fix: move to meet straight‑run guidelines.
- Cause: wrong transducer spacing. Fix: follow the device’s spacing table precisely.
False burst alerts
- Cause: washing machine fill spikes. Fix: add a 60–90 second grace period for spikes that settle.
- Cause: irrigation zone starts. Fix: label schedule windows and suspend burst checks for the first minute of a run.
Valve does not move
- Cause: no power or tripped internal fuse. Fix: verify voltage at the actuator and replace fuses per the manual.
- Cause: seized ball from mineral buildup. Fix: manually work it back and forth; if stuck, depressurize, remove, clean, or replace.
- Cause: failed limit switch. Fix: test with a multimeter and swap the actuator or the switch module.
Design tips that separate a hobby from a system
- Label everything: flow direction arrows, valve status indicators, and a physical “override” note with steps for house sitters.
- Keep spares: a spare actuator, a tube of coupling gel, and extra O‑rings prevent long downtime.
- Document baselines: log typical shower, dishwasher, washing machine, and irrigation zone flows. Use these to tune rules, not guesses.
- Stay vendor‑portable: prefer open or documented protocols and local APIs. If a vendor disappears, your system still works.
Summary:
- Pick a metering method that fits your plumbing: clamp‑on for no cuts, inline for accuracy, or a reader for existing meters.
- Use reliable networking and power: weather‑rated enclosures, UPS where possible, and Wi‑Fi or LoRaWAN as appropriate.
- Install a motorized ball valve with a manual bypass, and craft simple leak rules before you add nuance.
- Adopt ET‑based irrigation and rain/freeze skips; add soil sensors as a veto, not the sole driver.
- Process data locally, keep alerts human‑friendly, and provide obvious overrides for everyone at home.
- Maintain quarterly and seasonally, and keep spares and documentation to avoid downtime.
External References:
- EPA WaterSense (indoor and outdoor water efficiency)
- FAO Irrigation and Drainage Paper 56 (ET reference)
- The Things Network: LoRaWAN basics
- Home Assistant Utility Meter integration
- Flume Water Monitor (clip‑on consumer meter reader)
- EPA WaterSense: Irrigation controllers
- Wikipedia: Water hammer (overview)