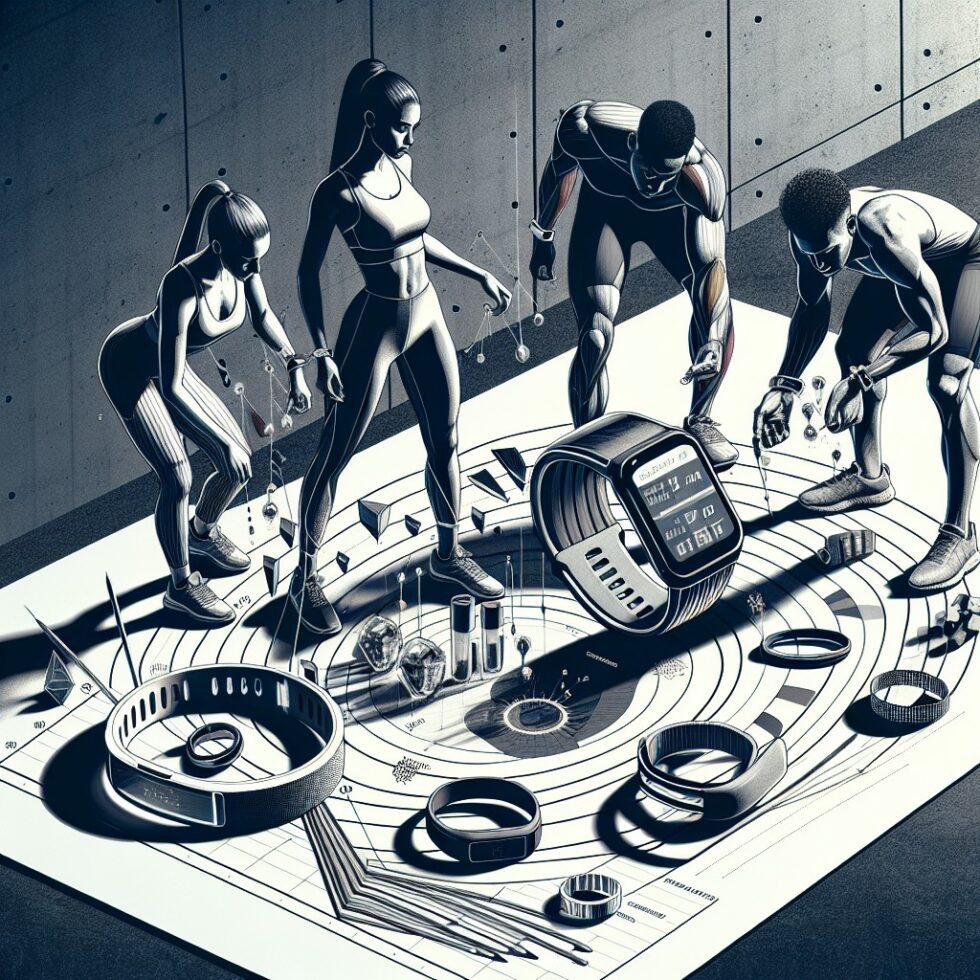
Your phone can count reps. Your watch can see fatigue. A racket can feel your swing. What used to be lab gear has slipped into pockets and gym bags. The result is a quiet shift in how people train. It’s not just pros and teams. Weekend runners, rec‑league players, and first‑time gym goers are building habits around data they can collect and understand in minutes.
This article explains how modern computer vision and wearable sensors work together in everyday sports. You’ll learn how to choose tools, avoid common mistakes, and turn raw numbers into safer sessions and better results. No hype, no heavy jargon—just reliable practices you can apply this week.
What Changed: Cameras + IMUs + Simple Models
Three building blocks make today’s training tools feel different from the fitness trackers of a decade ago.
Pose in Your Pocket
Modern phones can run pose estimation—software that locates key points on your body (shoulders, hips, knees, ankles) from regular video. These models are efficient enough to run on-device, so you can practice drills without sending video to the cloud. The output is not a movie; it’s coordinates over time that describe angles and movement. That means fast feedback with a small privacy footprint.
What it’s good at:
- Form cues in bodyweight or barbell exercises.
- Range of motion tracking for rehab and mobility work.
- Timing of jumps, landings, and changes of direction.
Where it struggles:
- Occlusion: when a limb is hidden behind equipment or another player.
- Low light: dim gyms and night fields degrade accuracy.
- Depth: a single camera can misjudge distance without careful setup.
Inertial Sensors in Everything
Wearables use an IMU (inertial measurement unit)—usually an accelerometer and gyroscope—to sense motion at hundreds of samples per second. You’ll find them in watches, foot pods, chest straps, smart insoles, and even instrumented balls and bats. Unlike GPS, which needs open sky, IMUs work indoors and react to quick, small movements.
What they capture:
- Acceleration spikes when you cut, jump, or strike.
- Orientation changes for swing and barbell path.
- Cadence and contact time in running gait.
What they need:
- Stable placement: a loose strap ruins data.
- Calibration: a short “stand still” or “hold steady” step improves accuracy.
- Context: pairing with video or a known drill clarifies what peaks mean.
Small Models on the Edge
Many apps now run helpfully on-device. That includes pose detection, rep counting, and movement classification. On-device processing lowers latency, preserves privacy, and works in places with poor signal. This is why you can get a rep speed number within seconds after a set, or form flags right after a video clip.
Three Sports, Three Practical Workflows
Let’s walk through simple setups that blend camera and sensors. Each one aims to improve a few decisions you make every week: How hard to go, what to fix, and when to rest.
Running: Clean Gait, Smarter Load
You don’t need a lab treadmill to learn from your stride. A phone and a foot pod (or watch) can cover most needs.
Setup:
- Place a phone on a stable surface at hip height, five to eight meters from your path.
- Record 15–20 seconds of you running at easy, steady pace, then at your 5K pace.
- Use a foot pod or watch to capture cadence, ground contact time, and vertical oscillation.
What to look for:
- Cadence within a comfortable range for your height and pace. Many runners find 165–180 steps per minute efficient at moderate speed.
- Consistency in ground contact time between left and right. Large imbalances can hint at fatigue or a nagging asymmetry.
- Knee and hip angles at mid-stance. Excessive knee collapse or hip drop suggests a form issue you can address with drills.
Action you can take: If cadence tanks late in a run while contact time rises, your plan for next week is clear: add recovery, sprinkle short strides to re-groove form, and push the harder workout later. If the right side shows longer ground contact time after hills, swap one speed session for strength that targets single-leg stability.
Common mistakes:
- Chasing a magic cadence number. It should scale with speed, not stay fixed.
- Overreacting to one run. Look for a pattern over at least three similar sessions.
Strength Training: Reps, Velocity, and Safe Progression
Vision plus IMU can turn a barbell into a measured tool. You can count reps, estimate bar speed, and stop sets before form degrades.
Setup:
- Position a phone or tablet roughly two meters away, at mid‑torso height, perpendicular to the lift.
- Use a barbell attachment sensor or a watch strapped snugly near the wrist for velocity cues.
- Record sets for squat, bench, or row at your usual working weight.
What to look for:
- Rep velocity drop-off across a set. A 20–30% slowdown is a common boundary for stopping a set to avoid junk reps.
- Bar path drift in the last third of reps. Sideways motion often shows fatigue before you feel it.
- Depth or range of motion consistency. A rep that looks “easy” because it is short is not the same rep.
Action you can take: If the bar slows sharply on rep four of a planned six, cut the set there and add another set later. Keep the quality high. If bar path wanders on your third set, lower weight and repeat with tight form. Quality now yields safer gains later.
Common mistakes:
- Comparing velocities across different lifts or equipment. Treat each lift’s numbers relative to your baseline.
- Ignoring warm-up. First sets are slower; use comparable body temperature and setup to measure progress.
Racket and Bat Sports: Feel the Swing You Actually Make
A small IMU on a racket handle or bat can map your swing path and tempo. A phone on a tripod captures contact quality and footwork.
Setup:
- Mount the sensor per manufacturer instructions, and do any needed calibration swings.
- Place a camera behind and slightly to the side. Frame feet and follow-through.
- Hit sets of 10 with the same target pattern.
What to look for:
- Tempo consistency (backswing to forward swing time ratio). Erratic tempo usually beats you before the opponent does.
- Swing plane relative to intended shot. If the plane is too steep for a flat drive, the physics is against you.
- Footwork alignment before contact. Vision flags late setups; the sensor can’t see your feet.
Action you can take: Build a warm-up routine that rehearses the tempo window that produces your best contact. If swing plane is right but contact is off, fix footwork. If footwork is fine but tempo varies, drill rhythm with a metronome cue.
Data You Can Trust: Accuracy and Calibration
Consumer gear is good, but not perfect. The goal isn’t lab precision. It’s repeatability and sane interpretation.
Camera Placement and Lighting
For pose estimation to work well:
- Distance: Place the camera far enough to capture the full body without zoom. Avoid extreme wide angles that warp limbs.
- Lighting: Use even light. Avoid backlight that turns you into a silhouette.
- Angle: For squats, side view. For push-ups, side or 45 degrees. For jumping, front or 45 degrees to see alignment.
If an app offers landmark confidence scores, watch them. Low confidence on knees or ankles means the clip is not reliable enough to judge form.
IMU Placement, Drift, and Sampling
Secure the sensor on a rigid point as close as possible to the movement you care about. A loose watch band makes velocity data useless. A shoe pod that rotates inside the laces corrupts contact time. Most modern IMUs sample at 100–200 Hz or more. That’s adequate for common drills. If you can set it, pick the highest rate you can while keeping battery life practical.
Drift is real. Many systems mitigate it with short calibration steps. Don’t skip them. If your app asks you to stand still for five seconds, that is not fluff—it’s the baseline the math uses to reduce error later.
Ground Truth and Test‑Retest
A simple way to check reliability is to repeat a standard drill weekly:
- Running: 6 x 30‑second strides on flat ground at the same effort.
- Strength: 3 sets of 5 at a known weight, same rest, same shoes.
- Racket: 10 cross-court forehands with the same target and feed.
If numbers swing wildly for the same drill, fix setup before you change training. Your body did not become 15% different in a week; your method did.
Safety First: Privacy, Consent, and Avoiding Overtraining
Tech should make training safer. Keep these guardrails in place.
- Privacy: Prefer apps that process video on-device or offer local storage. If you share clips, strip location data and blur bystanders.
- Consent: Don’t film teammates or minors without clear permission. Post-game analysis does not trump someone’s comfort.
- Numbers with context: Data points are not diagnoses. If pain persists, see a qualified professional. Use metrics to inform—not override—common sense.
- Fatigue signals: Heart rate variability, rep velocity decay, and subjective readiness work together. If two out of three say “rest,” listen.
Remember: “Doing more” is not the same as “getting better.” Quality reps and reliable recovery win over messy volume.
Choosing Gear: A Short Buyer’s Checklist
Don’t let glossy dashboards distract you. Look for these basics when comparing devices and apps.
- Data export: Can you get raw or summarized data out as CSV, FIT, or JSON? You should not be locked in.
- Sampling rates: IMUs should offer at least 100 Hz for quick movements; higher is better for striking sports and bar speed.
- Battery life and charging: If a device dies mid‑session or uses a fragile proprietary cable, you’ll stop using it.
- Mounting: Secure, repeatable placement beats clever but wobbly clips.
- On-device processing: For video and sensitive metrics, on-device or edge processing reduces latency and protects privacy.
- Water and sweat rating: Look for clear IP ratings if you train in all weather.
- Support and updates: Active software updates signal a healthier product than abandoned dashboards.
Simple Starter Projects You Can Try This Week
Hands-on tests make features click. Try one or two small builds to learn what your tools can do.
1) Knee Valgus Spotter for Bodyweight Squats
Place your phone on a chair in front of you. Record 10 slow squats. Use an app with pose estimation and note if knees drift inward relative to toes. Action: If drift appears late in the set, shorten sets or slow down tempo. Add glute activation drills in warm-up.
2) Five-Jump Consistency Test
Record five vertical jumps from the side. Track flight time or jump height if your app estimates it. Action: If jump five drops sharply, you’re not ready for depth jumps. Build elastic strength with smaller plyometrics first.
3) Run Form Snapshot on a Gentle Incline
Run 20 seconds up a mild hill. Cadence often improves naturally. Compare with flat ground. Action: If hill cadence feels better, use short hill strides weekly to groove rhythm without forcing it.
4) Bar Path Tagging
Film your bench press from the side. Draw a rough line from start to touch point. A slight diagonal toward the shoulders on the way up is common. Action: If the path swerves, lighten the load, brace harder, and cue elbows under the bar.
5) Swing Tempo with a Metronome
Set a metronome to a tempo that matches your best contact (e.g., 3:1 backswing to forward swing). Take 20 swings, record tempo consistency in the app. Action: Use the tone as a pre-shot routine. Consistent tempo is a free upgrade.
From Numbers to Decisions: Build a Micro Feedback Loop
Data matters only if it changes what you do. Here’s a simple loop to make that happen without turning training into a spreadsheet contest.
Pick One Metric Per Cycle
Choose a metric that matches your current goal. Examples:
- Running base phase: weekly cadence consistency.
- Strength block: average rep velocity for your primary lift.
- Racket sport: tempo variability on your forehand.
Set a Clear Trigger
Define what will make you change a plan. For example: “If rep velocity drops more than 25% on set two, reduce weight 5% next session.” Triggers keep emotion out of mid‑workout decisions.
Review in 10 Minutes or Less
After the session, check the metric, tag the workout with one or two words (e.g., “flat,” “snappy,” “tight hips”), and write a single sentence about what you’ll change next time. That’s it. Long notes are rare and optional.
Share Selectively
If you have a coach or training partner, share the one chart or clip that shows the issue. More is not better. Focus on a decision you want help with.
What’s Coming: Smarter Surfaces, Instrumented Gear, and Live Cues
The next wave of training tech won’t be just on your wrist or in your pocket. It will be in the space around you.
- Instrumented balls, bats, and rackets: Tiny sensors are already inside consumer gear, tracking spin, impact, and vibration patterns. Expect more consumer options that export usable data.
- Smart playing surfaces: Pressure‑sensing turf and courts can record foot pressure maps and contact timing. These combine with overhead video to show how movement and force interact.
- Micro‑localization: Indoor positioning tags can track your path with sub‑meter accuracy in gyms, courts, and indoor tracks. That turns “ran around” into “covered 900 m at 3.8 m/s with three sharp decelerations.”
- Audio coaching: Subtle cues delivered during rest—“shorter ground contact next rep”—can help you adjust without staring at a screen mid‑set.
- More on-device analysis: As edge chips improve, form checks and fatigue models will run entirely on your phone or watch, keeping private clips private.
As these tools appear, apply the same rules: prefer repeatability over novelty, privacy over convenience, and clear triggers over vague dashboards.
Troubleshooting: When Tech Gets in the Way
Even well-designed systems can distract you. Here’s how to keep training smooth.
- Too many alerts: Disable mid‑set coaching unless a cue is essential for safety. Batch your feedback between sets.
- Fuzzy goals: If you can’t name the decision a metric supports, hide it. You don’t need ten charts to know that sleep was short.
- Gear drift: If numbers “break,” assume setup changed. Revisit mounts, straps, and camera distance before rewriting your plan.
- Analysis paralysis: Pick a 30‑minute weekly block for review. Outside that time, train.
Case Study: A Four‑Week Mini Plan Using Simple Tech
Let’s outline a short plan for a recreational runner who lifts twice a week and plays tennis on weekends. The goal is to improve 5K pace without nagging knee pain.
Week 1: Baseline and Cleanup
- Running: Easy mileage. Record one 20‑second clip on flat ground and one on a gentle incline. Capture cadence and ground contact time.
- Strength: Two sessions, moderate weight. Record one squat set from the side. Measure rep velocity with your watch or bar sensor.
- Tennis: One match. Record a short forehand drill with swing tempo. No focus on spin yet.
- Goal: Identify one form cue for running (e.g., “soft landings”), one stop trigger in strength (20% velocity drop), and one tennis tempo range.
Week 2: Small Adjustments
- Running: Add 4 x 20‑second hill strides. Use the hill clip to reinforce cadence.
- Strength: Keep weight, hold sets when velocity drops by 25%. Stamp out knee drift in squats.
- Tennis: Forehand rhythm drill with metronome. Keep camera angle and distance identical.
- Goal: Stabilize cadence and rep quality. No volume spikes.
Week 3: Controlled Stress
- Running: One short interval session (e.g., 6 x 2 minutes at 5K effort). Record the last rep’s form clip.
- Strength: Tiny load increase (2–3%). Maintain stop trigger.
- Tennis: Progress to cross‑court target drill. Track tempo variability.
- Goal: Keep form within baseline bounds under higher effort.
Week 4: Review and Taper
- Running: Cut volume by 20%. Keep strides. Re‑record flat and hill clips.
- Strength: One lighter session with perfect form.
- Tennis: Play, but focus on footwork into contact.
- Goal: Compare week‑4 clips to week‑1. Look for steady cadence, shorter ground contact, and fewer knee‑in events. If you see them, you earned your 5K test.
This plan uses one metric per domain, clear stop rules, and simple clips. It’s enough to adjust habits without turning training into a science project.
Why This Works: Simple Physics, Consistent Habits
Vision and wearables help because they make invisible details visible. Cadence links to vertical motion and landing force. Rep speed tracks fatigue better than “feels heavy.” Swing tempo stabilizes timing before contact. None of this replaces coaching or experience. It just compresses the feedback loop so you can correct course while it still matters.
Start small. Pick a metric. Define a trigger. Review fast. Repeat. The tech will get better every year. Your habit can start today.
Summary:
- Modern training uses phone cameras and IMU‑based wearables to measure form, timing, and fatigue quickly and privately.
- Pose estimation is great for joint angles and timing; IMUs excel at quick motion, orientation, and contact time.
- Workflows for running, strength, and racket sports show how to turn clips and signals into clear next steps.
- Accuracy depends on camera angle, lighting, secure sensor placement, calibration, and repeatable drills.
- Safety improves when you honor stop triggers, prioritize privacy, and share data with consent.
- A good buyer’s checklist includes data export, sampling rates, mounting stability, on-device processing, and real support.
- Simple starter projects let you learn fast without overhauling your routine.
- Build a micro feedback loop: one metric per cycle, a clear trigger, and a 10‑minute review.
- Next steps in sports tech include instrumented gear, smart surfaces, indoor micro‑localization, and subtle audio coaching.